
OverviewInstructionsResourcesActivity Management
Jing is a screen capture and screen recorder tool. You can use Jing to capture either a still image on your screen or record any video of onscreen action.
Units |
Presentation Tools, Video Tools |
Duration |
1 hour |
Standards |
Communication |
LEVEL |
Beginner, Intermediate, Novice |
WEBSITE |
Visit Jing Website |
OS |
PC or Mac |
PREREQUISITES
None
OBJECTIVES
At the end of this session, participants will be able to:
- Explain how to design Jing tasks focused on student learning.
- Download and install Jing on their computers.
- Capture a still picture on their screen.
- Record the video of their onscreen action.
- Share their recorded image or video over the web
MATERIALS NEEDED
- Internet connection
- Web browser
Step-By-Step Instructions
- Go to Jing’s website http://www.jingproject.com/
- Click on the Download button on the right side of the screen to download the free application
- Follow the online instruction to download and install the application
- Launch the application
- Check or uncheck the providing feedback option and click on the Continue button to move forward
- Enter a valid email address, username and password to finish the registration process
- After the set up process is completed, click on the Ok button.
- The Jing icon will appear at the top center of your computer screen

- Move your mouse over to the first of the three items on the Jing icon

- Click on it and a guide appears for you to choose the part you want to capture
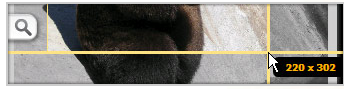
- Drag the guide to the display screen that you want to capture
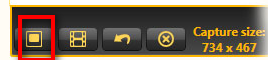
- Choose the capture mood: image capture or video screen capture. If you choose to capture an image, click on the capture image icon
- Enter the name for your captured image, use the tools on the left to draw arrows, box es, enter texts etc. on the image, click on the disk icon and then browse to save the captured image to your desired location

- If you choose to do a video screen capture, click on the film icon
![]()
- start your narration once the counters disappears and then navigate to the parts that you want to capture
- Click the “Stop” button in the pop-up window when you have completed the screen capture
- Click on the big right arrow in the middle of the pop-up window to watch what you have captured

- If you want to keep it, enter the name and decide where you want to save the video
- Click on the first icon if you want to save it and share it over the web

- Click on the second icon (the disk icon) to save it onto your local computer

- click on cancel icon if you decide not to use it

- You can click on the Tool icon to customize your tool bar, for example, your can create icon for You Tube on the tool bar

- Click on the You Tube site if you have one to publish your video on You Tube
Additional Resources and Works Cited
Activity Management
None